
Mandatory Claims in OAuth 2.0 with Identity Server 5.3.0


When logging in to the Playground2 Sample with the Identity Server(as in the previous blog post - Getting Started with OAuth 2.0 using WSO2 Identity Server 5.3.0 and Playground2 Sample), it prompted for few claim values again although those claims were already set in the logged in user’s profile.


This blog post provides the steps to be taken in order to avoid this being prompted each and every time a user logs in.


This happens since these 2 local claims (http://wso2.org/claims/organization and http://wso2.org/claims/givenname) are not mapped in OIDC claim dialect as mentioned in https://docs.wso2.com/display/IS530/Adding+Claim+Mapping.


In order to map, following steps should be followed.


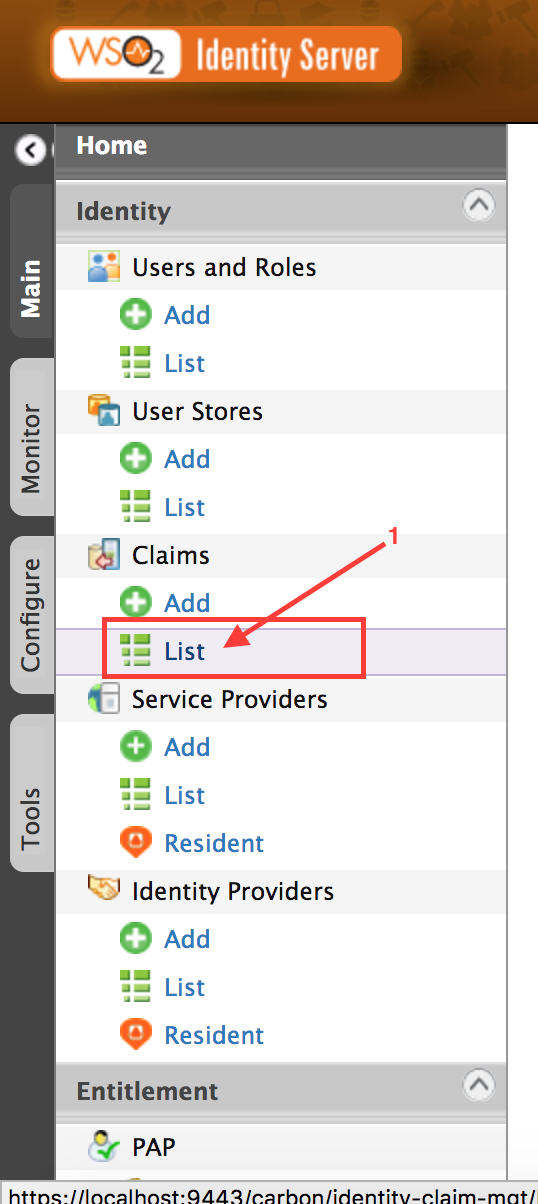
Select 'List' under 'Claims' in WSO2 Identity Server Management Console Main Tab.

Screen Shot 2017-02-21 at 8.34.55 PM.png

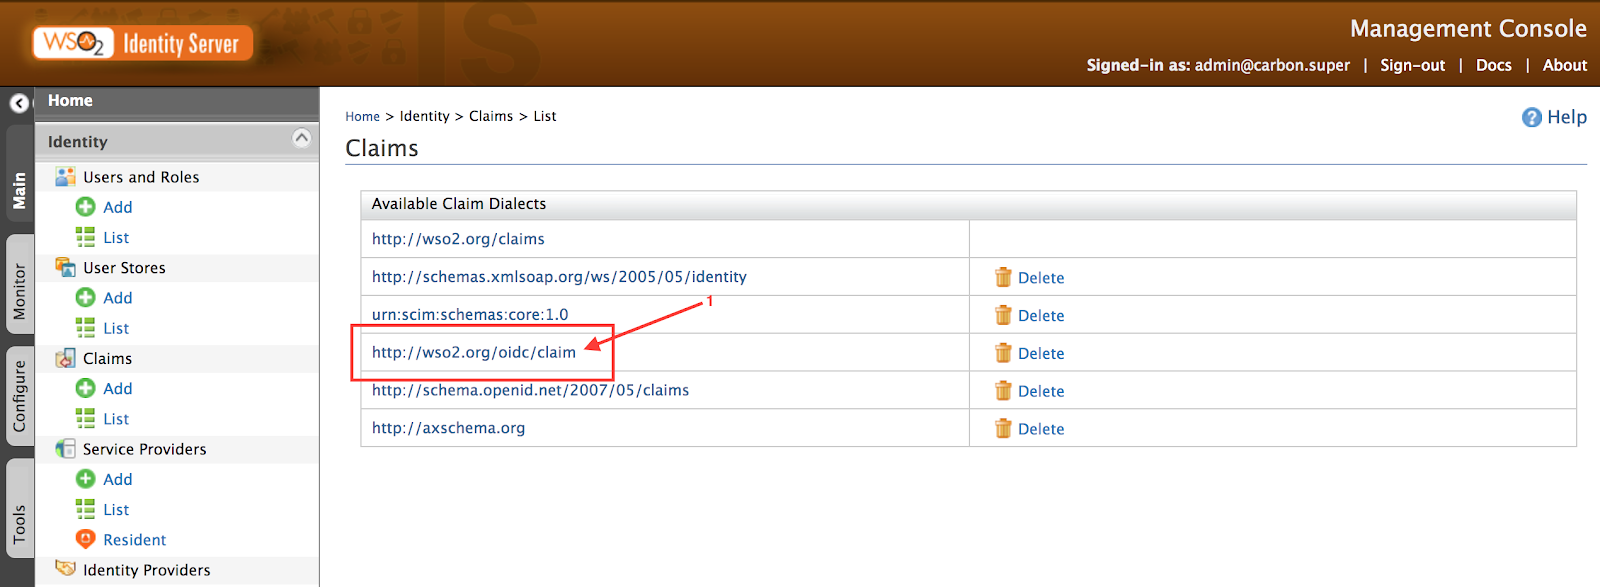
From there, select 'List' under 'Claims' in WSO2 Identity Server Management Console Main Tab.

Screen Shot 2017-02-21 at 9.14.27 PM.png


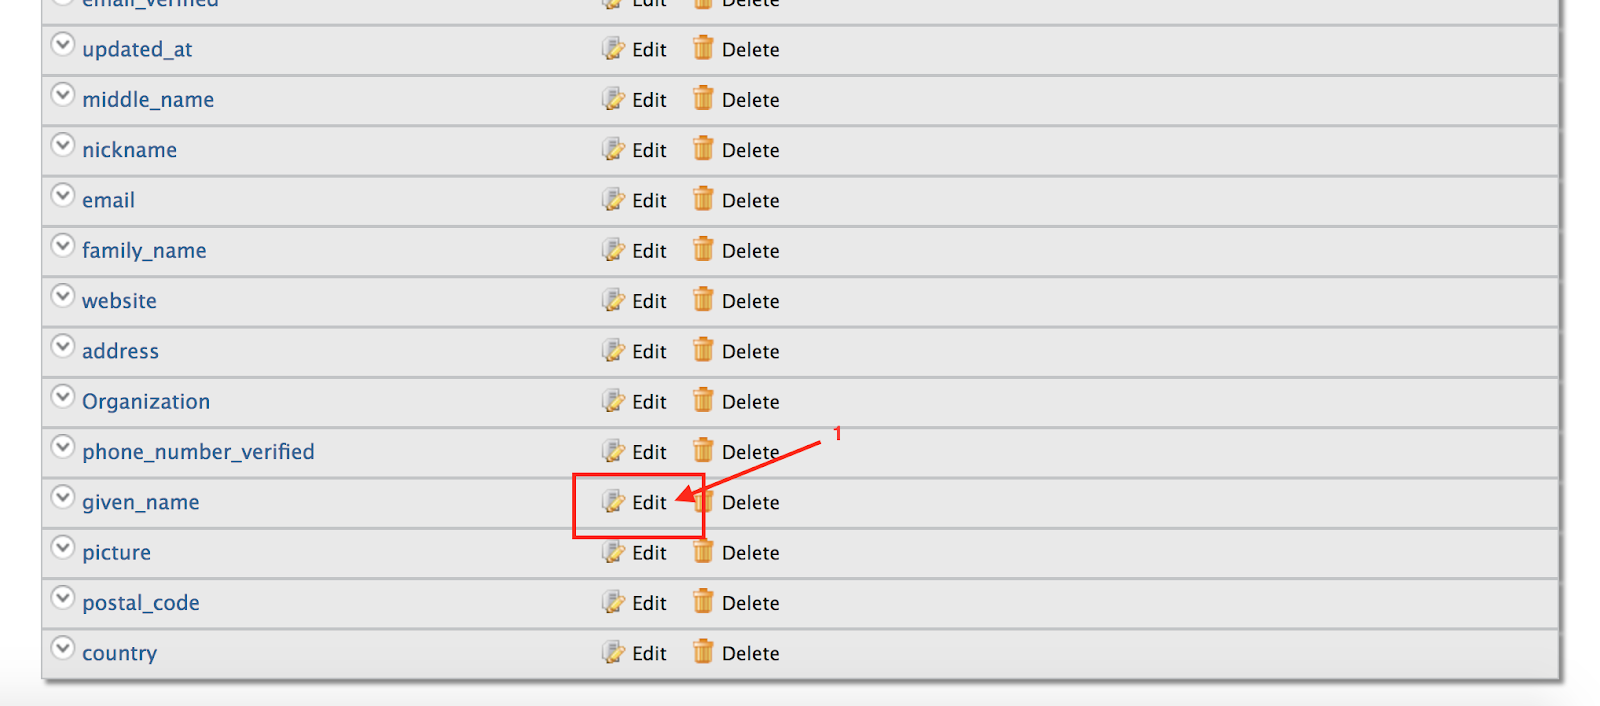
Next, select the OIDC claim dialect to be mapped from the list. Since I want to map the 'given_name' claim, I will select the 'Edit' of that claim as below.
Screen Shot 2017-02-21 at 9.22.41 PM.png
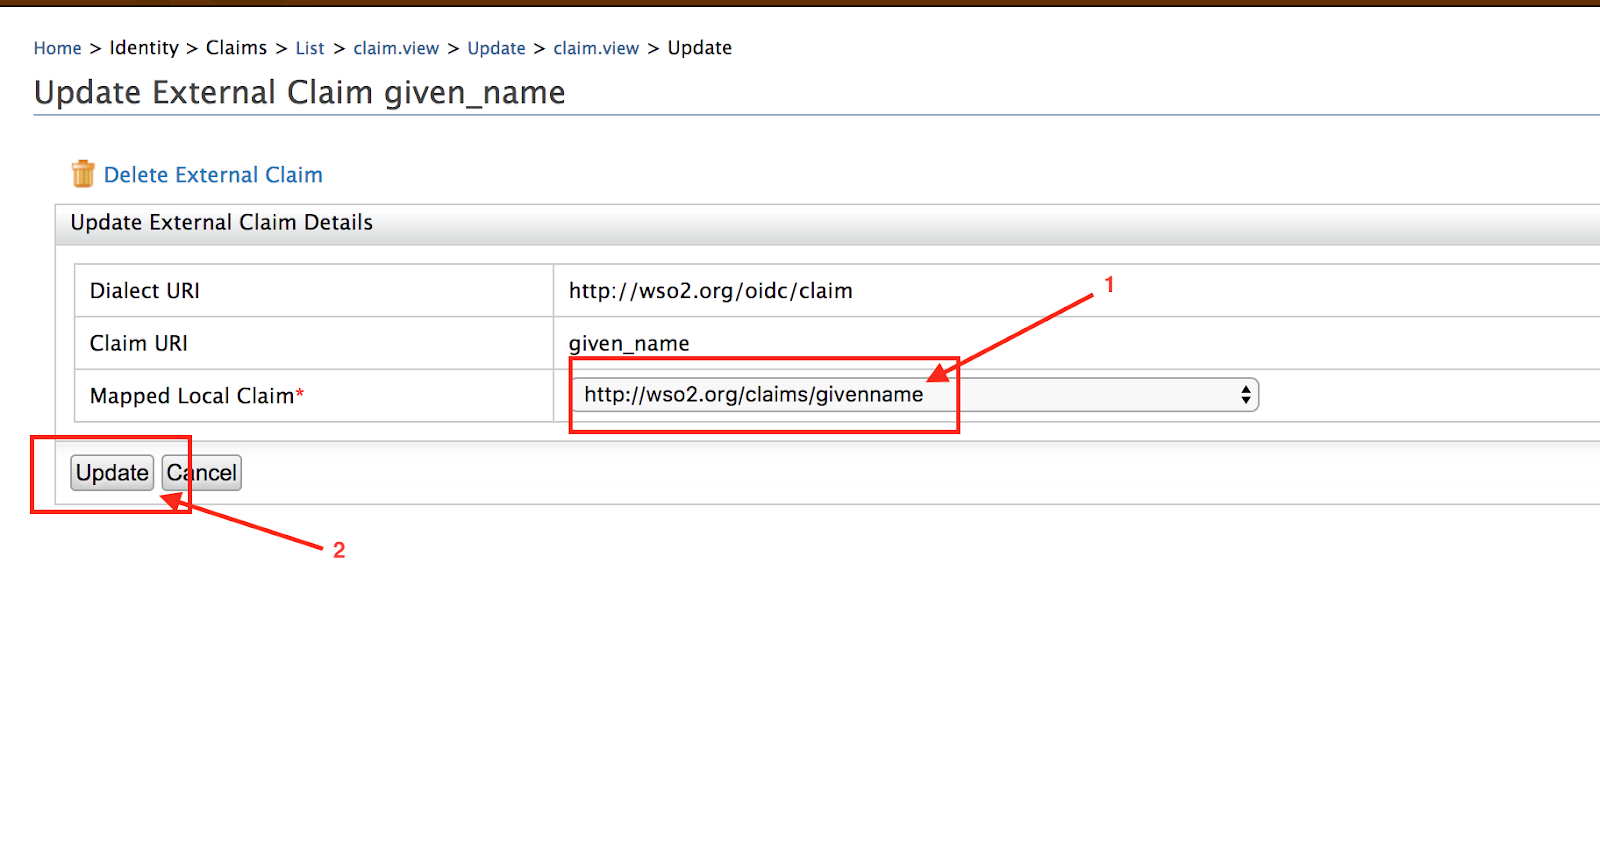
From the below given interface, select 'http://wso2.org/claims/givenname' from the 'Mapped Local Claim' dropdown and 'Update'.

Screen Shot 2017-02-21 at 9.25.22 PM.png
In order to add the claim 'Organization', select 'Add' under 'Claims' in WSO2 Identity Server Management Console Main Tab.
Screen Shot 2017-02-21 at 9.33.37 PM.png

Then, next step is to select 'Add External Claim' from the given options.


Screen Shot 2017-02-21 at 9.41.08 PM.png


From here, in the 'Dialect URI' dropdown select the dialect you want to add the claim to. I will select 'http://wso2.org/oidc/claim' since that's the claim we want to add the claim to.


Then provide the claim as 'External Claim URI' and select the local claim as 'Mapped Local Claim' from the drop down.

Screen Shot 2017-02-21 at 9.44.41 PM.png
After following these steps you can successfully log in to the Playground2 without providing Mandatory claims.


As mentioned above, if any user claim you set in the claim configuration of the service provider to be received to the client app, if the same claim is not added in the Open ID Connect Dialect, after authentication Identity Server will request the user to provide those claims. In order to avoid that, always make sure to map all the requested claims in the OIDC dialect with the claims in the Local Claim Dialect.  

Comments

Popular posts from this blog

Admin panel of a Q & A Forum

In a Q & A Forum, when a user posts a question, it should be sent to the administrator for approval in case it contains inappropriate content. After approval it should be removed from this pending approval page and other users should be able to see the question afterwards. To enable this, we should maintain an approval column in our database table of records and for each record approval should be set to false by default. In the Pending approvals page only the records with approval=false should be displayed. Below is  the MySQL  statement for retrieval, $sql="SELECT * FROM topics WHERE approval=false"; To know which post was approved we should embed the post_id to the URL. And the relevant post should be updated as approval=true. Below is the complete code. <?php $sql="SELECT * FROM topics WHERE approval=false"; $query=mysqli_query($conn,$sql); echo '<form name="approve" method="p...

Getting Started with OAuth 2.0 using WSO2 Identity Server 5.3.0 and Playground2 Sample

This blog post provides step by step instructions for trying out OAuth 2.0 using WSO2 Identity Server . Here I use Identity Server 5.3.0 which is the latest released version by the time of this writing. The official documentation for this is available in https://docs.wso2.com/display/IS530/OAuth+2.0+with+WSO2+Playground , however for a beginner, it does not provide all the instructions such as creating a Service Provider with necessary configuration. However, by following the steps below, you can simply setup Identity Server and the playground2 sample webapp and test the entire OAuth 2.0 flow. Creating the Service Provider First step is to create a service provider in Identity Server. This is required because when a client application talks to Identity Server via OAuth 2.0, Identity Server has to identify the client and the incoming traffic. We set this configuration inside the service provider. Login to the Management Console of Identity Server and create a service provi...

Interacting with an Ethereum Smart Contract using Meteor and Ethereum

This blog post contains steps on how to interact with a specific contract on the blockchain extending the application created in the previous blog post [1]. Step 1: Add  frozeman:template-var This is used since we use callback very often. This wrapper can be found at [2]. Give the following command in order to add it to our application. meteor add frozeman:template-var Step 2: Adding the balance to be viewed inside the template Alter your code as below. main.js main.html When you refresh the browser, you should get the below output without having to click the button. Step 3: Writing the Smart Contract in Solidity Solidity is the language that ethereum uses to write smart contracts. In order to write the smart contract for our application we will use the online Solidity compiler which can be found at [3]. Step 4: Deploying the Smart Contract Log in to the MetaMask and make sure you are on the testnet. Select 'Create' in the right side p...