This blog post contains steps on how to interact with a specific contract on the blockchain extending the application created in the previous blog post [1].
Step 1: Add frozeman:template-var
This is used since we use callback very often. This wrapper can be found at [2].
Give the following command in order to add it to our application.

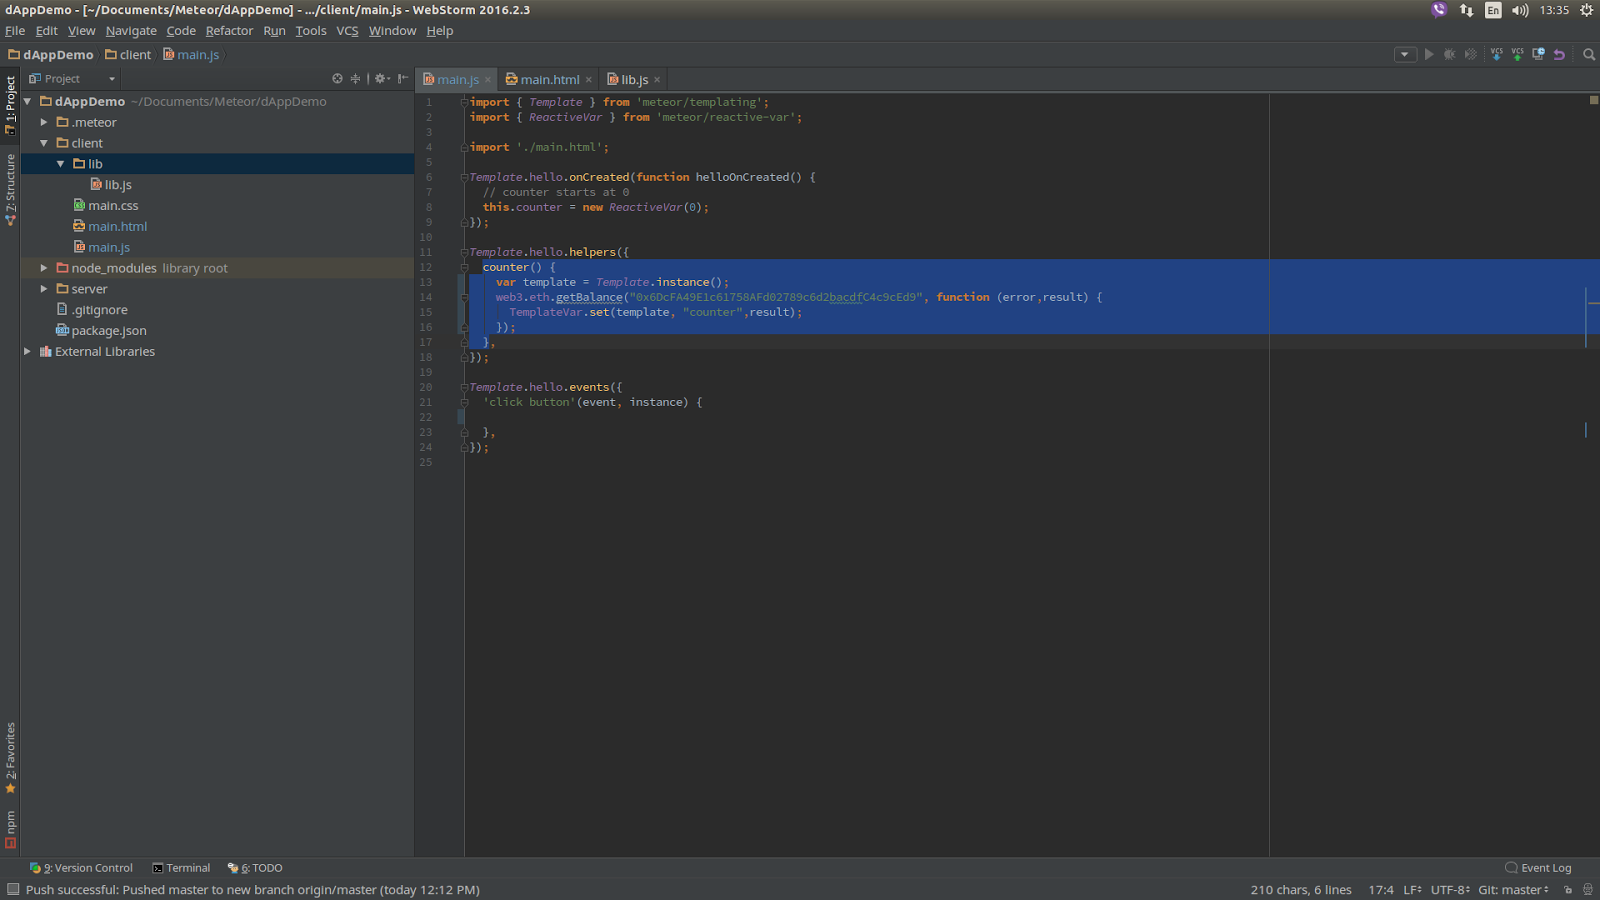
Step 2: Adding the balance to be viewed inside the template
Alter your code as below.
main.js
main.html
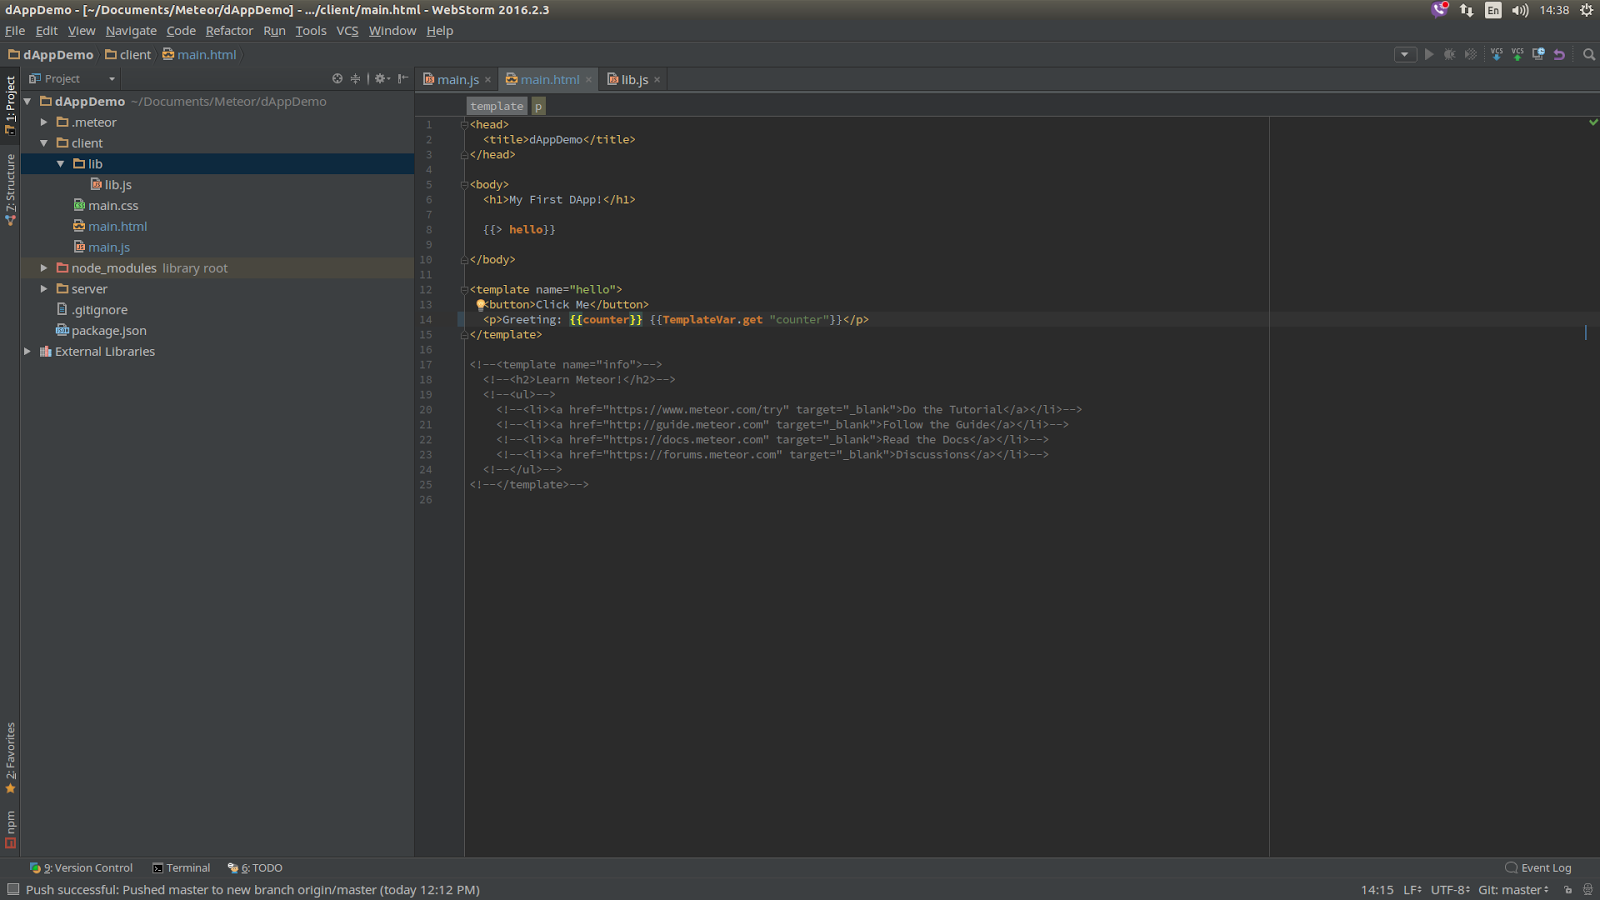
When you refresh the browser, you should get the below output without having to click the button.

Step 3: Writing the Smart Contract in Solidity
Solidity is the language that ethereum uses to write smart contracts. In order to write the smart contract for our application we will use the online Solidity compiler which can be found at [3].
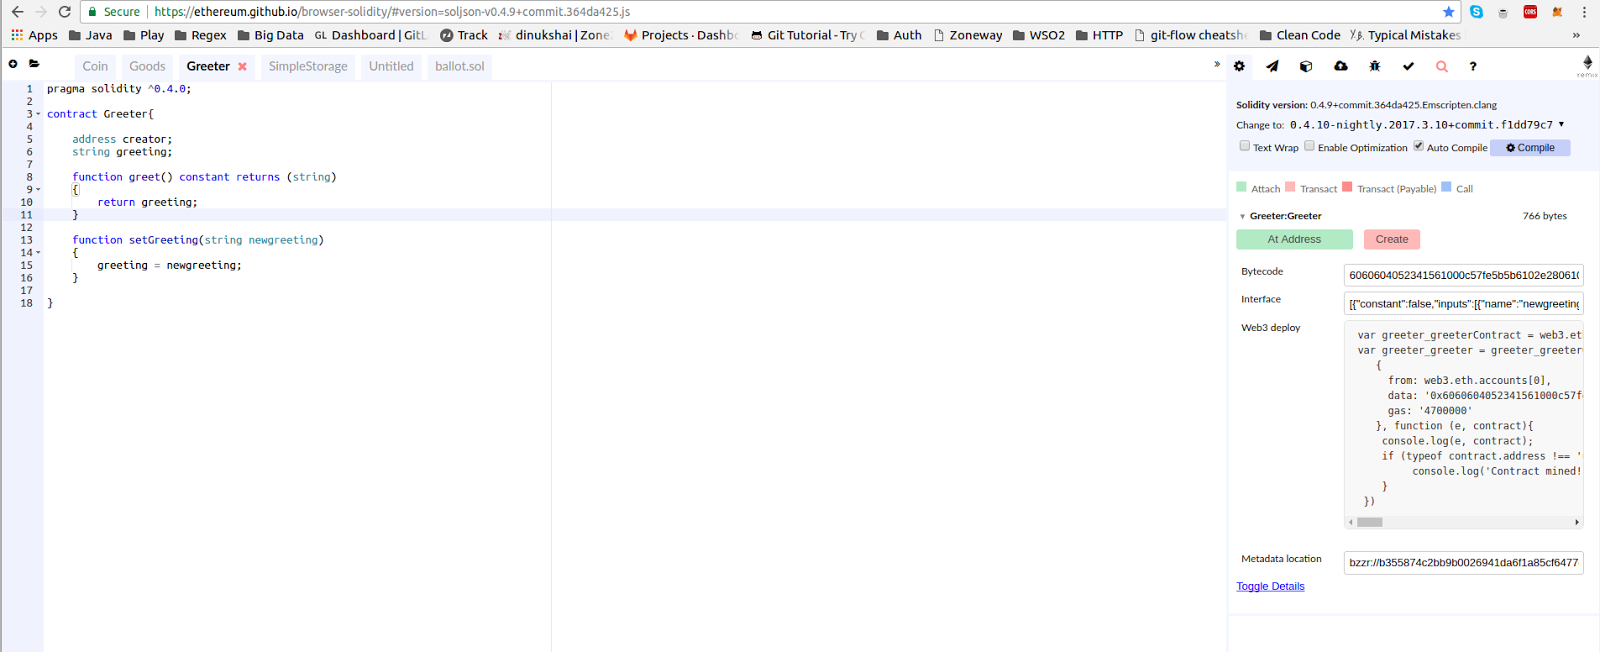
Step 4: Deploying the Smart Contract
Log in to the MetaMask and make sure you are on the testnet.
Select 'Create' in the right side pane in the Solidity compiler. This will open up a notification as below.
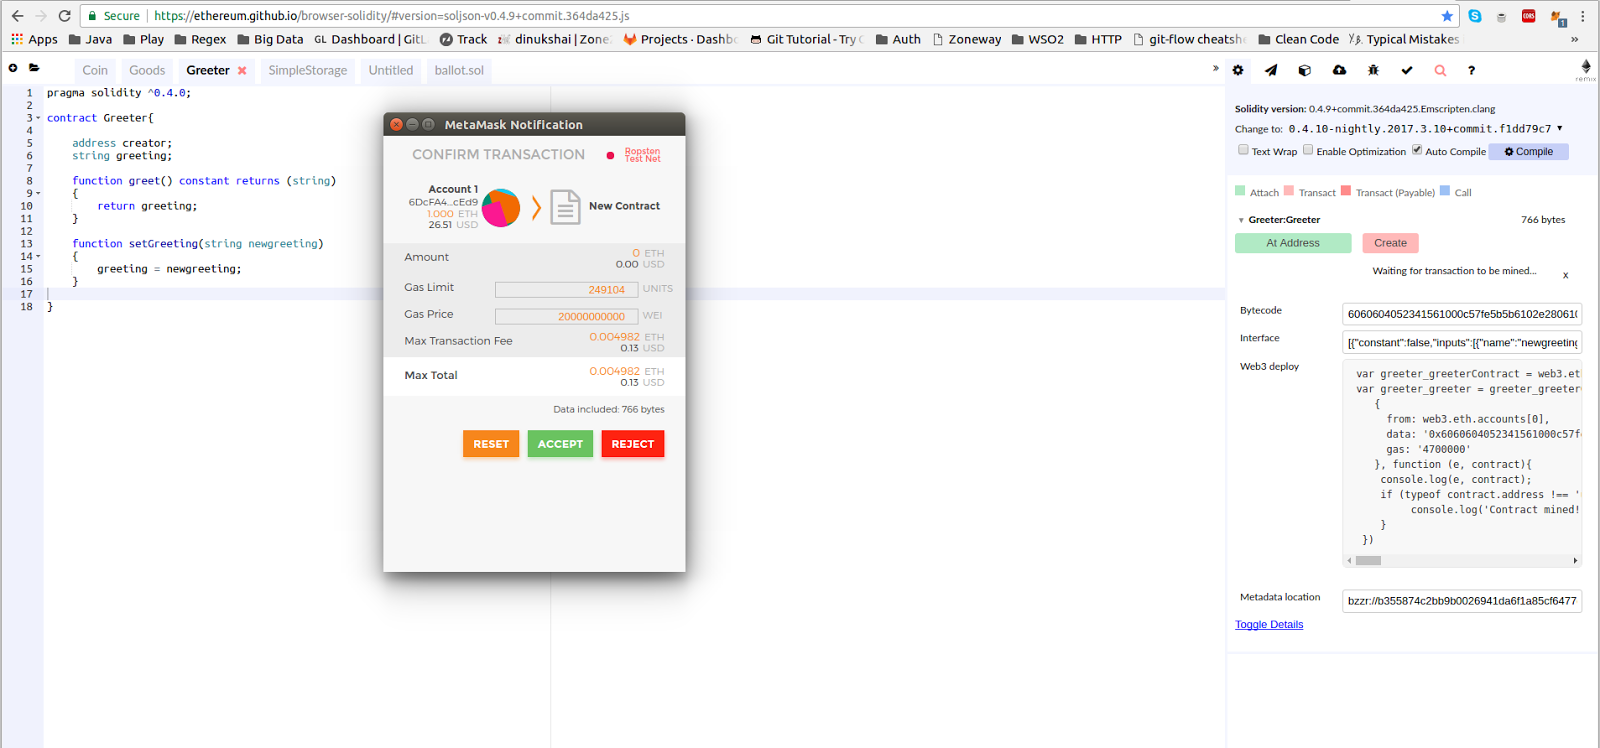
Accept the contract.
You will see that the Contract has been published via the meta mask extension.
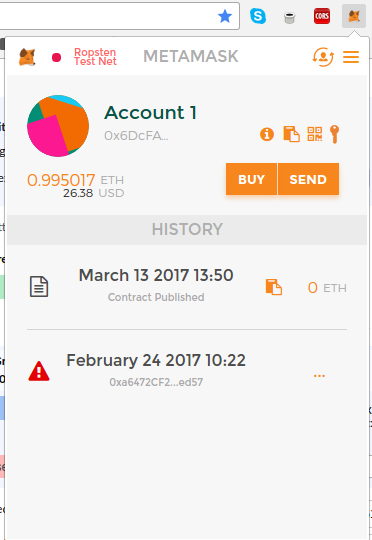
If you select the transaction, you can view this on the testnet as below.
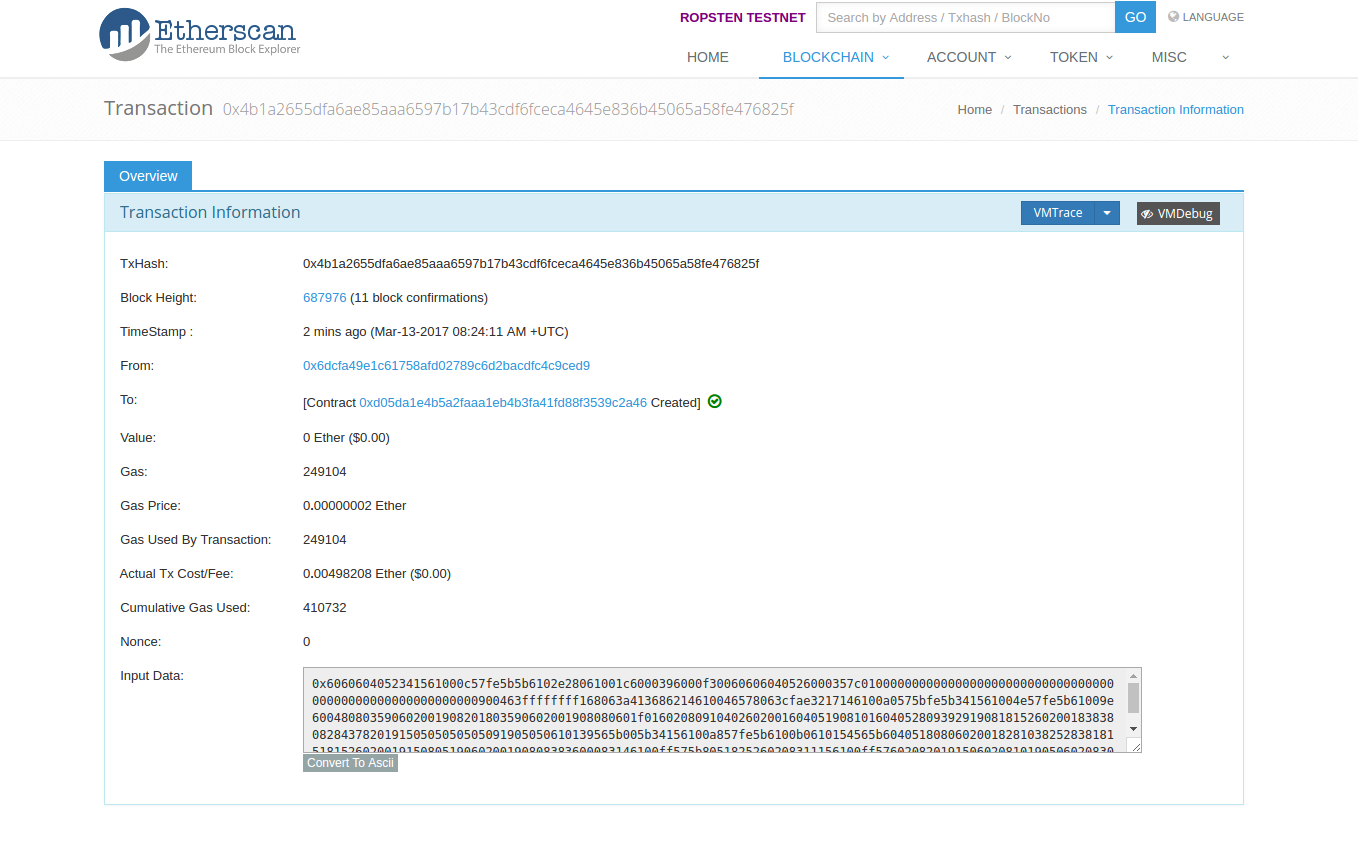
According to this, the contract address is 0xd05da1e4b5a2faaa1eb4b3fa41fd88f3539c2a46 and we will need this inorder to interact with the Testnet deployed Smart Contract.
Step 5: Interacting with the Smart Contract
Initiate a few variables containing the contract address, ABI (is called the Interface in the right hand pane in the Solidity Compiler), data (is called as Bytecode in the Compiler).
These data are obtained from the below pane in the Solidity Compiler.
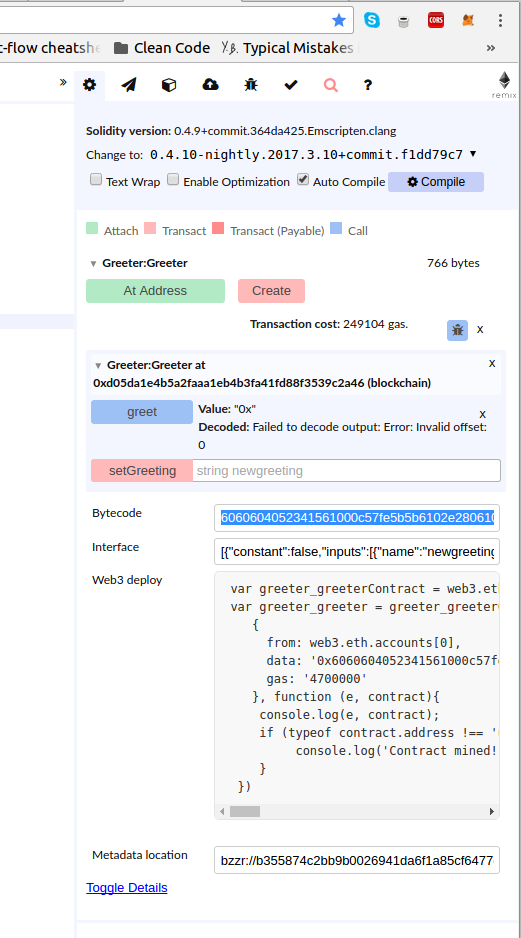
Alter your main.js as below.
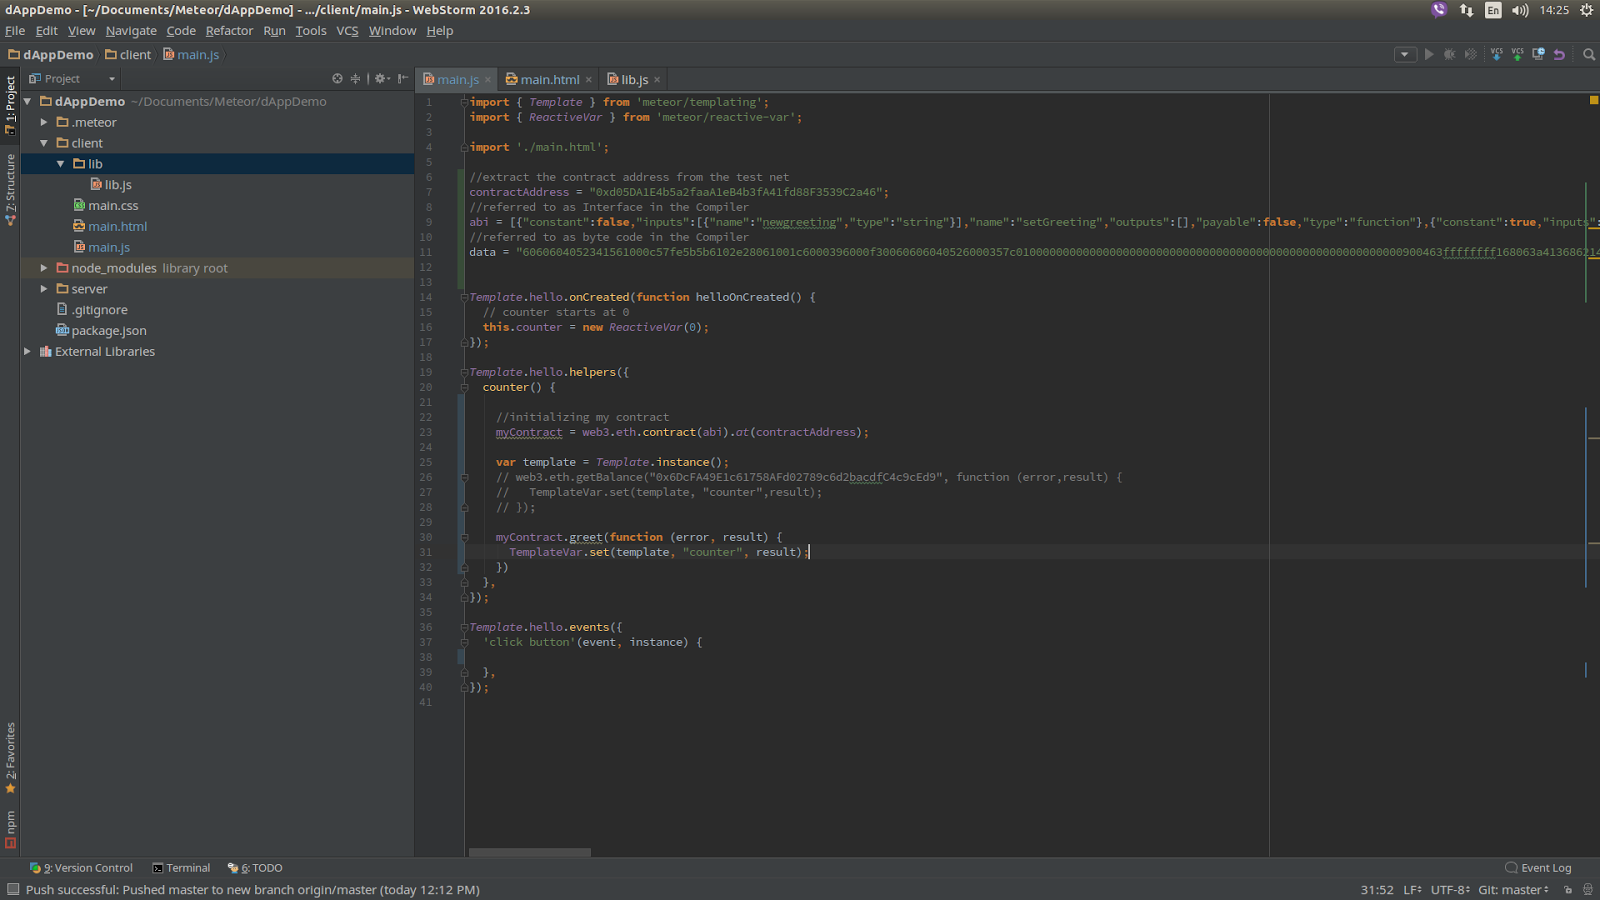
What this does is calling the greet function that is on the smart contract. To test this you can set a value initially using the Solidity Compiler from the right hand side pane as below.
greet and setGreeting were the functions we specified.
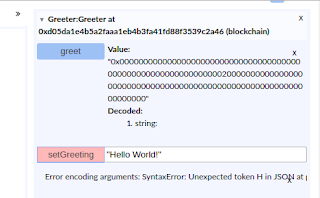
After it is set, you will be prompted a Meta Mask Notification.

After you accept it you can see this transaction in the testnet and you can observe the following output in the browser.
Compiler output:
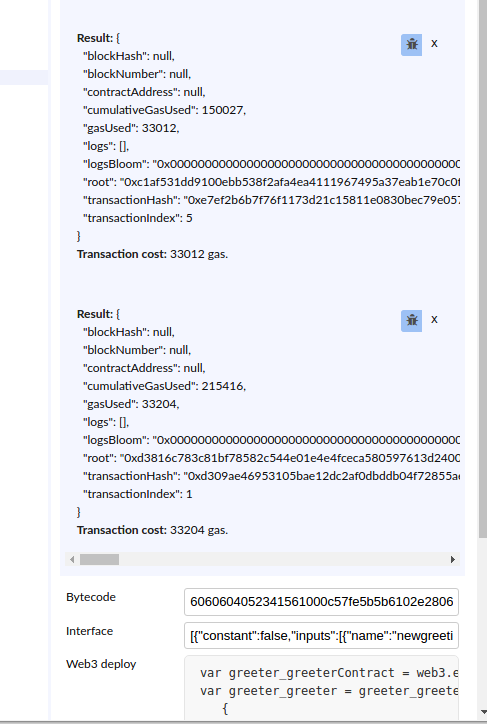
Testnet Output:
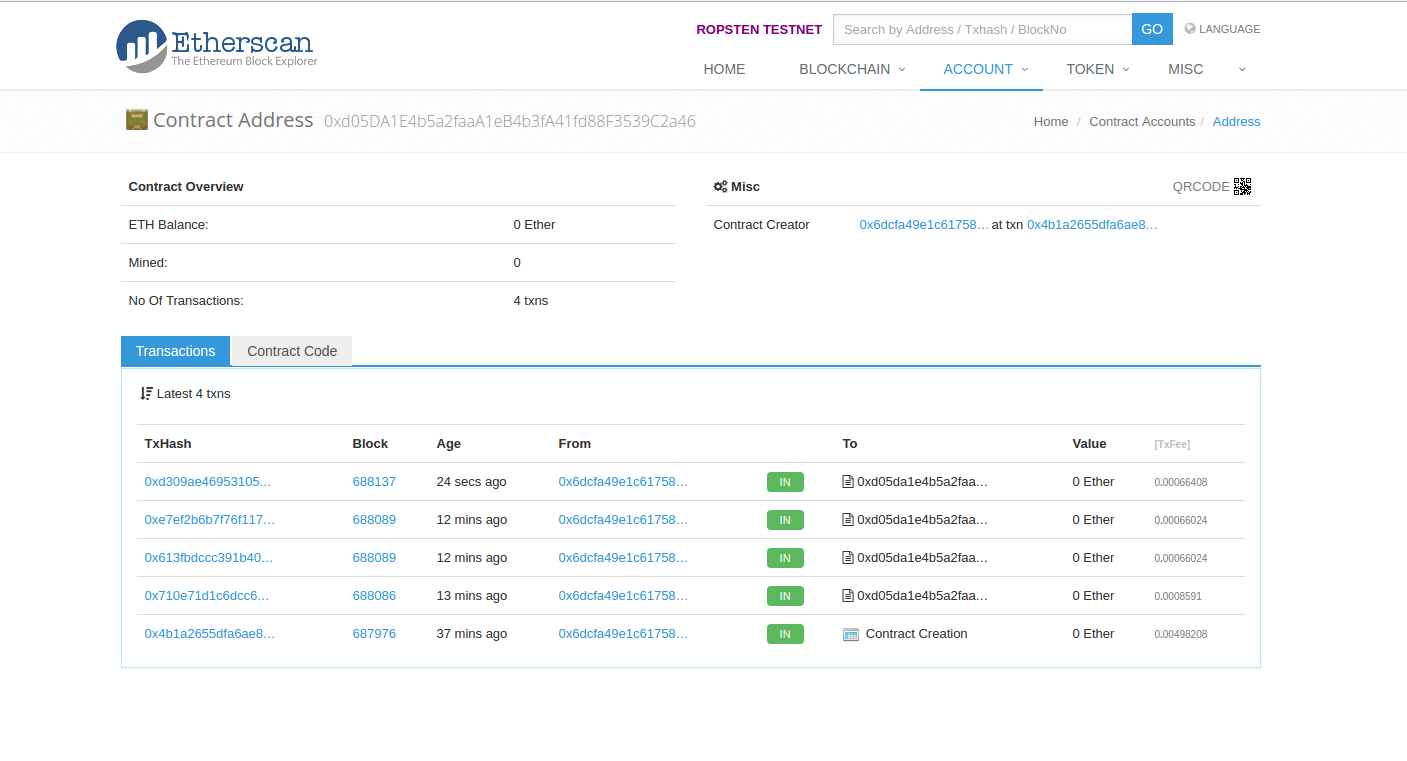
Browser Output:

Source code for a different sample application built on top of these basics can be found at [4].
[1] http://dinukshaish.blogspot.com/2017/03/creating-dapp-using-ethereum-and-meteor.html
[2] https://github.com/frozeman/meteor-template-var
[3] https://ethereum.github.io/browser-solidity
[4] https://github.com/dinuish94/EthereumDemoApp
Step 1: Add frozeman:template-var
This is used since we use callback very often. This wrapper can be found at [2].
Give the following command in order to add it to our application.
meteor add frozeman:template-var

Step 2: Adding the balance to be viewed inside the template
Alter your code as below.
main.js

main.html

When you refresh the browser, you should get the below output without having to click the button.

Step 3: Writing the Smart Contract in Solidity
Solidity is the language that ethereum uses to write smart contracts. In order to write the smart contract for our application we will use the online Solidity compiler which can be found at [3].

Step 4: Deploying the Smart Contract
Log in to the MetaMask and make sure you are on the testnet.
Select 'Create' in the right side pane in the Solidity compiler. This will open up a notification as below.

Accept the contract.
You will see that the Contract has been published via the meta mask extension.

If you select the transaction, you can view this on the testnet as below.

According to this, the contract address is 0xd05da1e4b5a2faaa1eb4b3fa41fd88f3539c2a46 and we will need this inorder to interact with the Testnet deployed Smart Contract.
Step 5: Interacting with the Smart Contract
Initiate a few variables containing the contract address, ABI (is called the Interface in the right hand pane in the Solidity Compiler), data (is called as Bytecode in the Compiler).
These data are obtained from the below pane in the Solidity Compiler.

Alter your main.js as below.

What this does is calling the greet function that is on the smart contract. To test this you can set a value initially using the Solidity Compiler from the right hand side pane as below.
greet and setGreeting were the functions we specified.

After it is set, you will be prompted a Meta Mask Notification.

After you accept it you can see this transaction in the testnet and you can observe the following output in the browser.
Compiler output:

Testnet Output:

Browser Output:

Source code for a different sample application built on top of these basics can be found at [4].
[1] http://dinukshaish.blogspot.com/2017/03/creating-dapp-using-ethereum-and-meteor.html
[2] https://github.com/frozeman/meteor-template-var
[3] https://ethereum.github.io/browser-solidity
[4] https://github.com/dinuish94/EthereumDemoApp
Comments
Post a Comment